Dog gear field guide
How to Put On a Dog Harness
A harness that’s on wrong is almost as bad as no harness at all. It shifts under load, rubs the armpits raw on a long trail, or lets a determined dog back out entirely. Here’s how to put it on correctly the first time, for every harness type.
A dog harness that fits and sits correctly distributes leash pressure across the chest and shoulders instead of the throat, gives you better control on steep terrain, and stays in place for eight hours of trail use without chafing. A harness that’s on wrong does none of those things. The most common issues, a harness that shifts forward, rubs the armpits raw, or lets a dog back out entirely, are almost always caused by incorrect application or a simple adjustment that was never made.
This guide covers every common harness style used for hiking. If you haven’t chosen a harness yet, our guide to the best dog harnesses for hiking ranks the top options by trail use, fit, and dog size. For anyone hiking Oregon’s trails with a dog, the Cascades, the coast, the Gorge, a harness that actually fits is one of the most important pieces of gear you’ll carry.
1. The Three Main Harness Types
How you put on a harness depends entirely on what style you have. The three most common types for hiking each go on differently, and using the wrong method for your style is the single most common cause of a poorly fitting result.


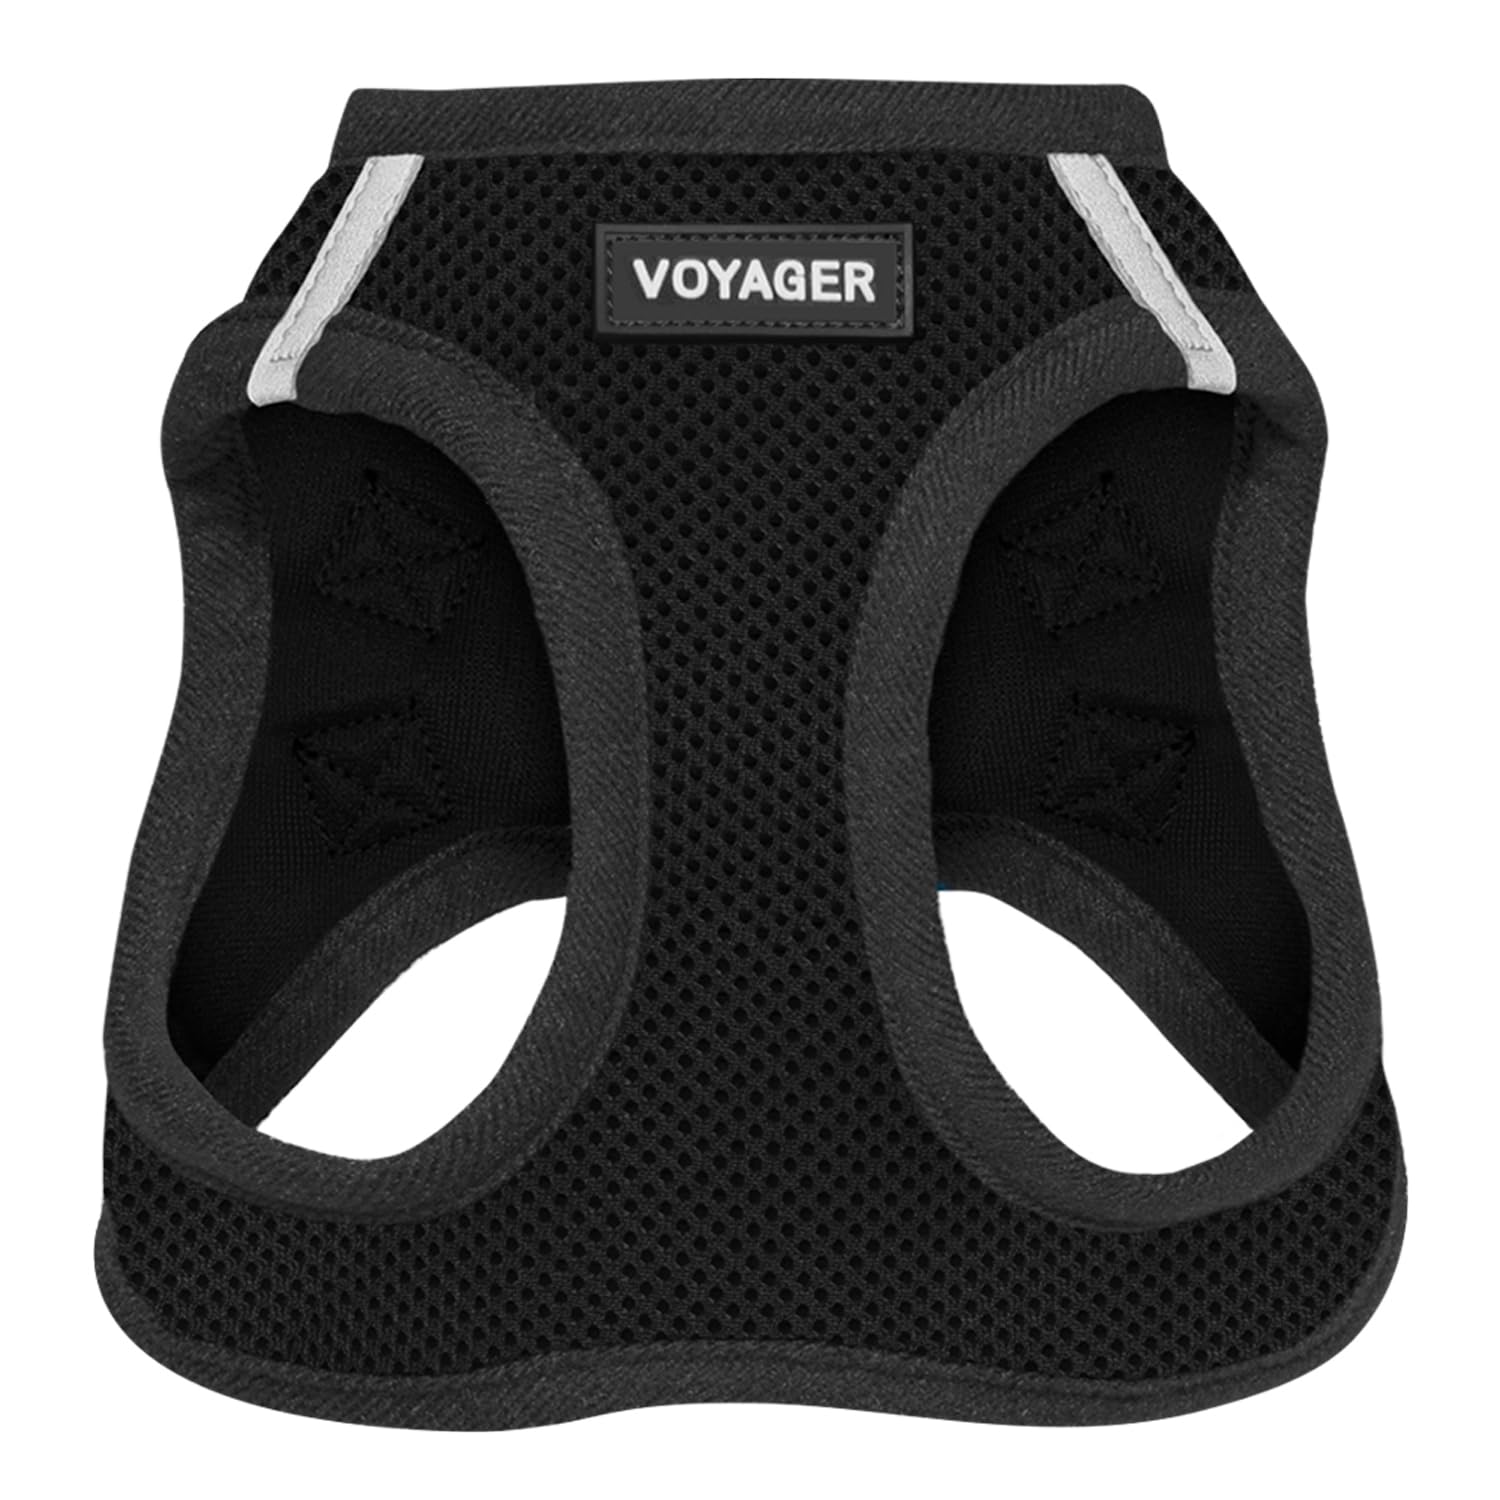
Not sure what type you have? Lay the harness flat and look at its shape. A step-in harness forms two distinct loops side by side. An overhead harness has a single neck loop with a strap that drops down one side and a buckle under the belly. A vest harness is a continuous padded panel with leg holes and multiple closures.
2. Before You Start: Loosen Everything
The single most important prep step is loosening every adjustable strap before you bring the harness anywhere near your dog. A harness that’s already cinched from the last use is harder to position correctly, more likely to catch fur during application, and more stressful for a dog who hasn’t warmed up to the process. Pull every slider to its widest setting and open every quick-release buckle. If the harness has load-bearing straps, common on hiking and pack harnesses, loosen those too. You’ll tighten everything to fit once it’s in position, not before.
Also take a moment to orient the harness correctly. The back D-ring (the leash attachment point) goes on top. The chest panel or chest strap goes at the front. On most harnesses there will be a logo, a label, or a clearly padded panel on the outward-facing side to help identify top from bottom. Getting this right before you start saves the frustration of a half-applied harness that turns out to be upside down.
If your dog is new to harnesses or reluctant to have things put over their head, use treats at every stage. Reward after the harness goes on, again after each buckle, and again after the fit check. Most dogs habituate to the process within three to five sessions. Rushing it because you’re late to the trailhead is how you create a dog who fights the harness every time.
3. Step-by-Step Instructions by Harness Type
Step-in harness
Lay the harness flat on the ground in front of your dog. With all straps loosened it forms two open loops side by side. Hold a treat just past the harness to lure your dog forward and cue them to step one front paw into each loop. Most dogs figure this out in a few tries. Once both paws are placed, lift the back connector up along the sides toward the shoulder blades. Clip or buckle the connector behind the shoulder blades, then adjust both side straps evenly so the harness sits level across the back. One side tighter than the other will cause the whole thing to rotate during use.
Overhead harness
Hold the neck loop open with both hands and lower it over your dog’s head from the front. Settle the neck loop so it sits just behind the ears, not pressed against the throat, with the chest strap resting against the breastbone. From there, pick up the left front paw gently and thread it through the fixed side opening. Bring the belly strap under the ribcage and connect it to the buckle on the opposite side, positioning it just behind the front legs at roughly the last rib. Check that the D-ring is sitting between the shoulder blades before you tighten anything, then snug all straps evenly.
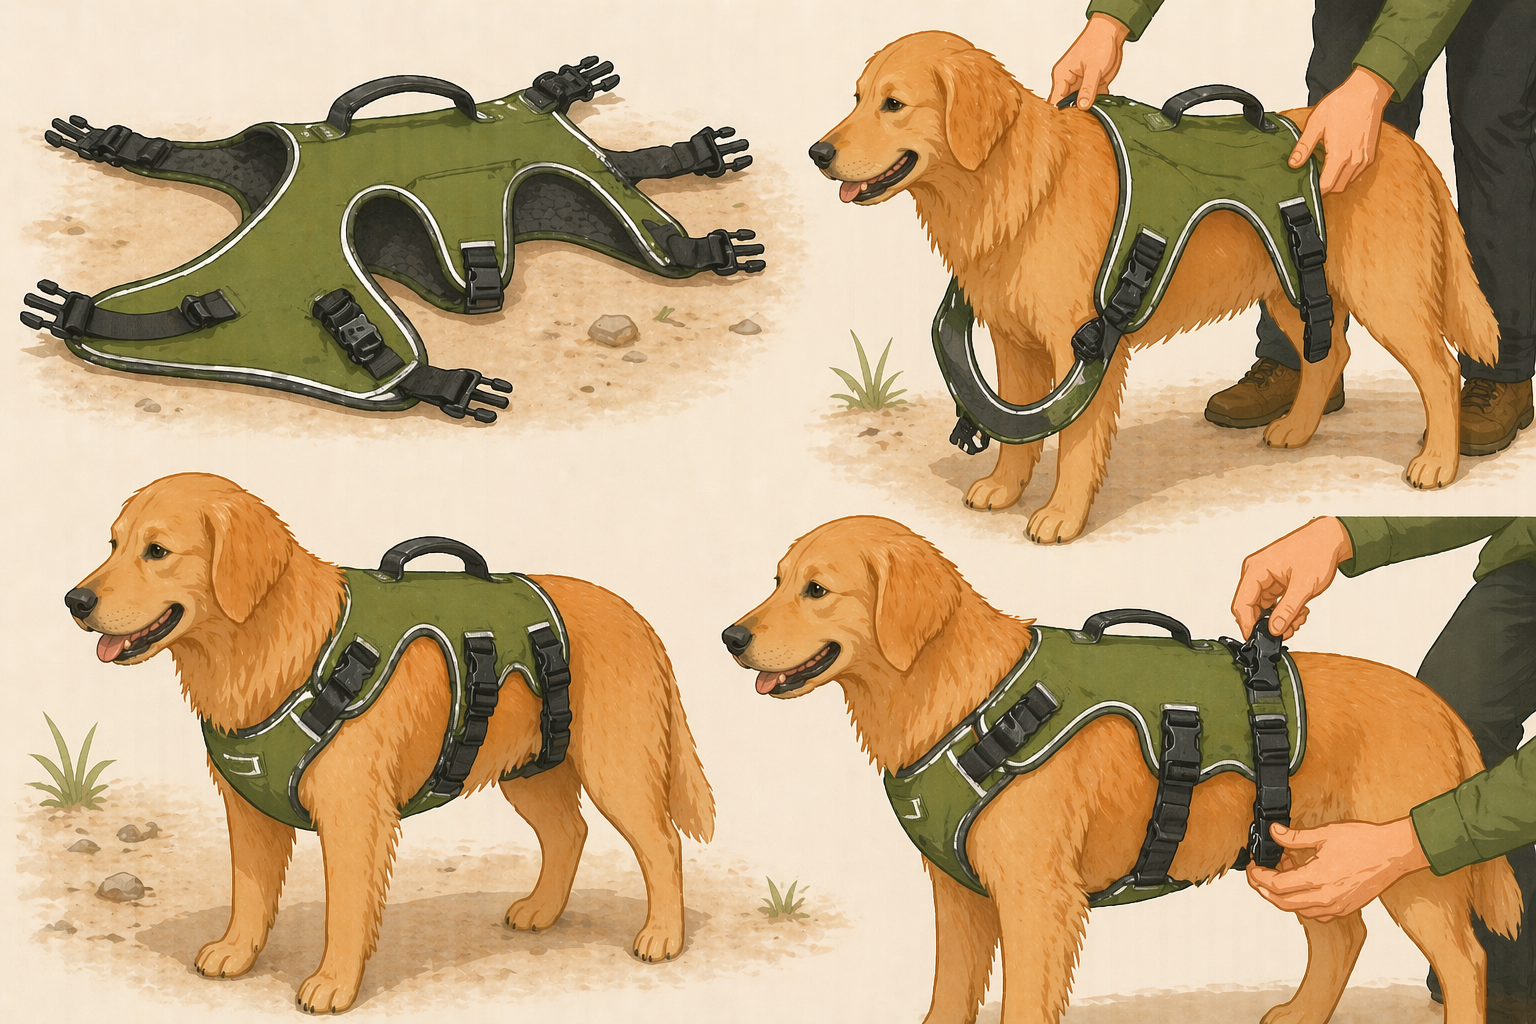
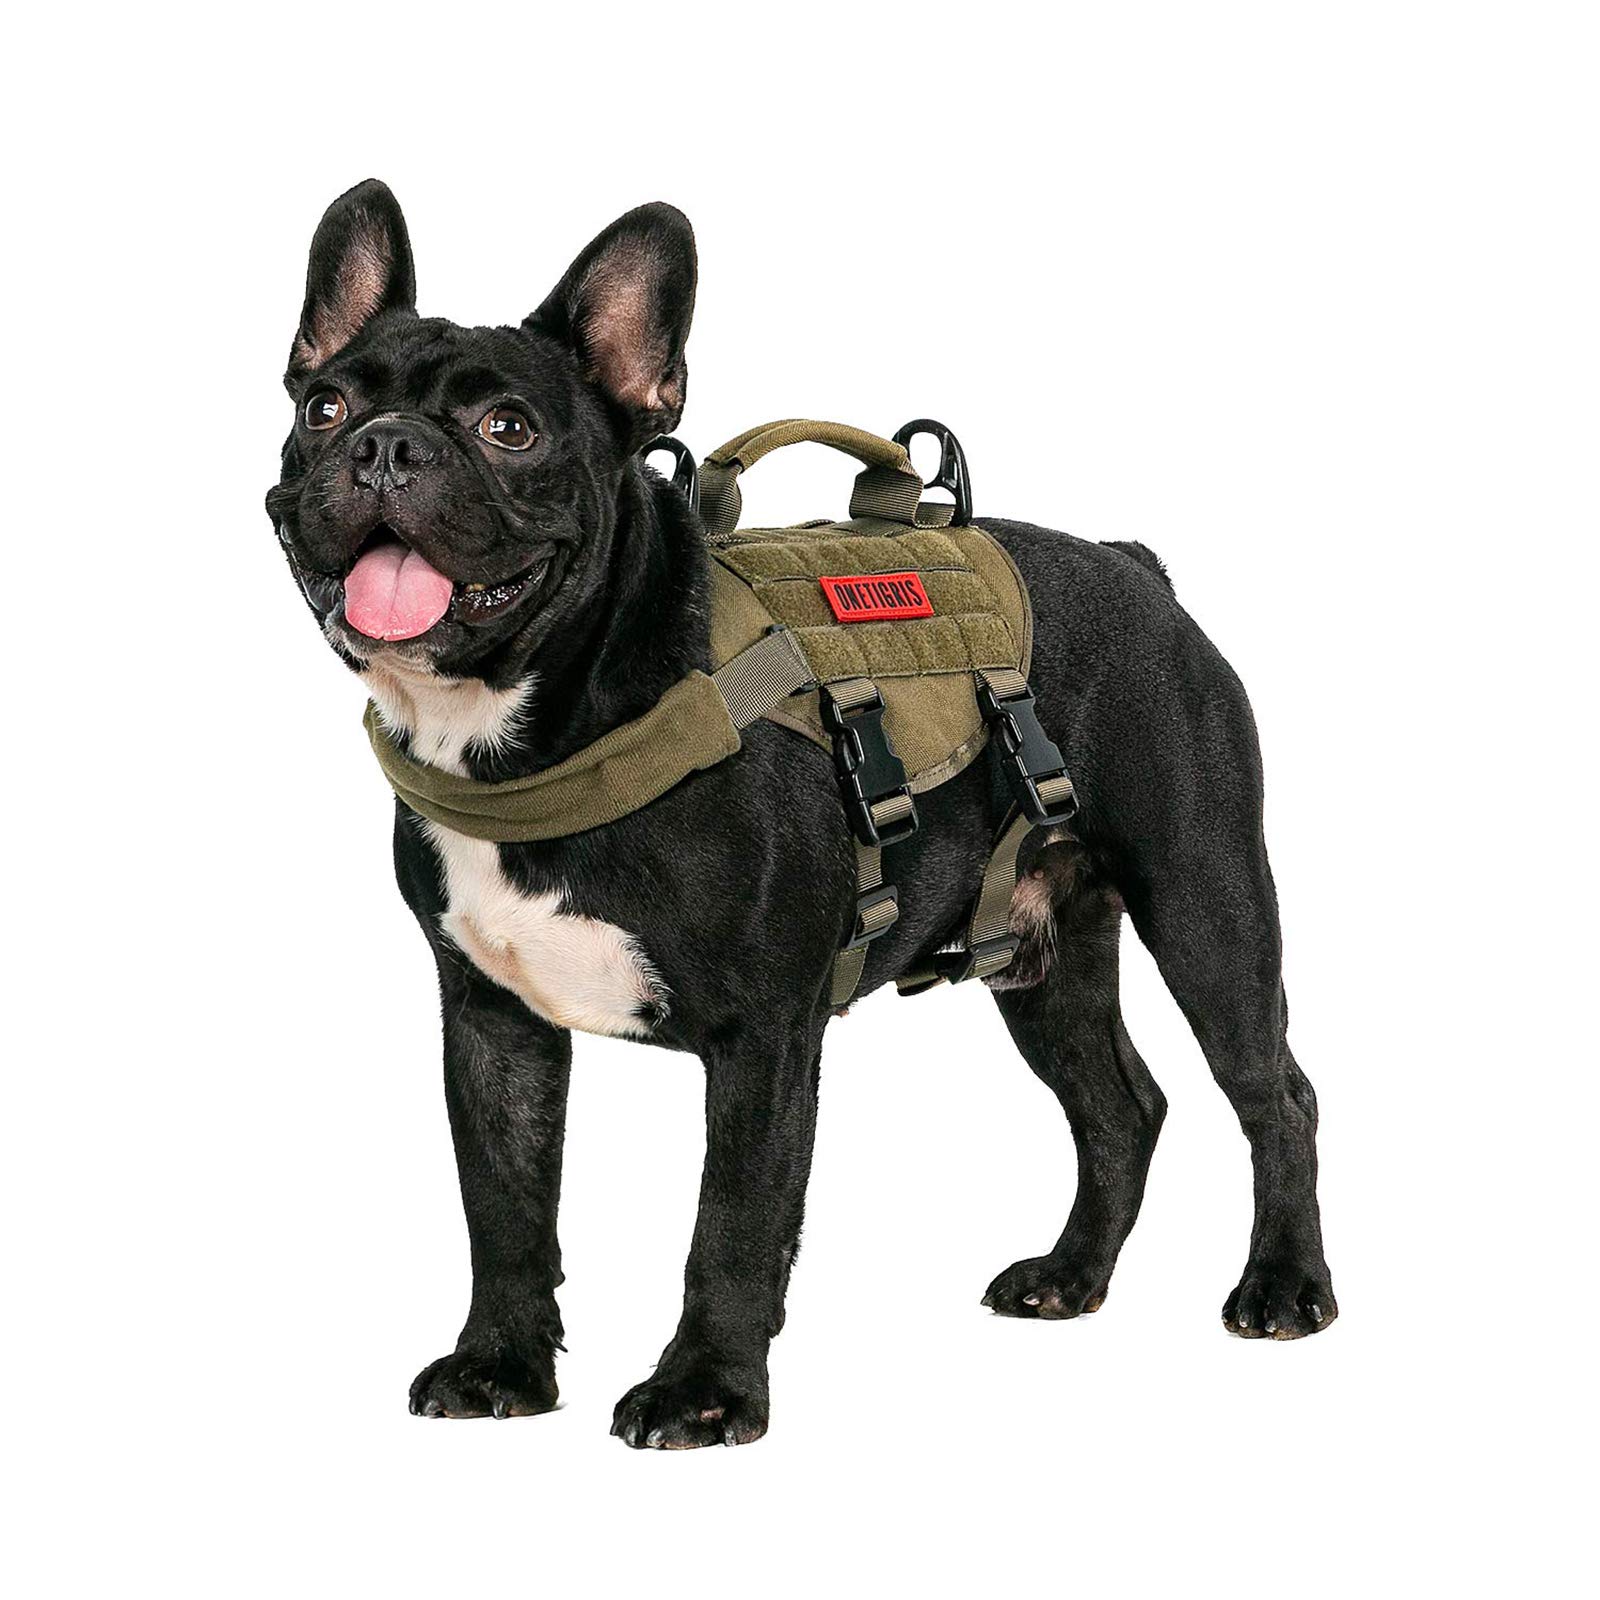
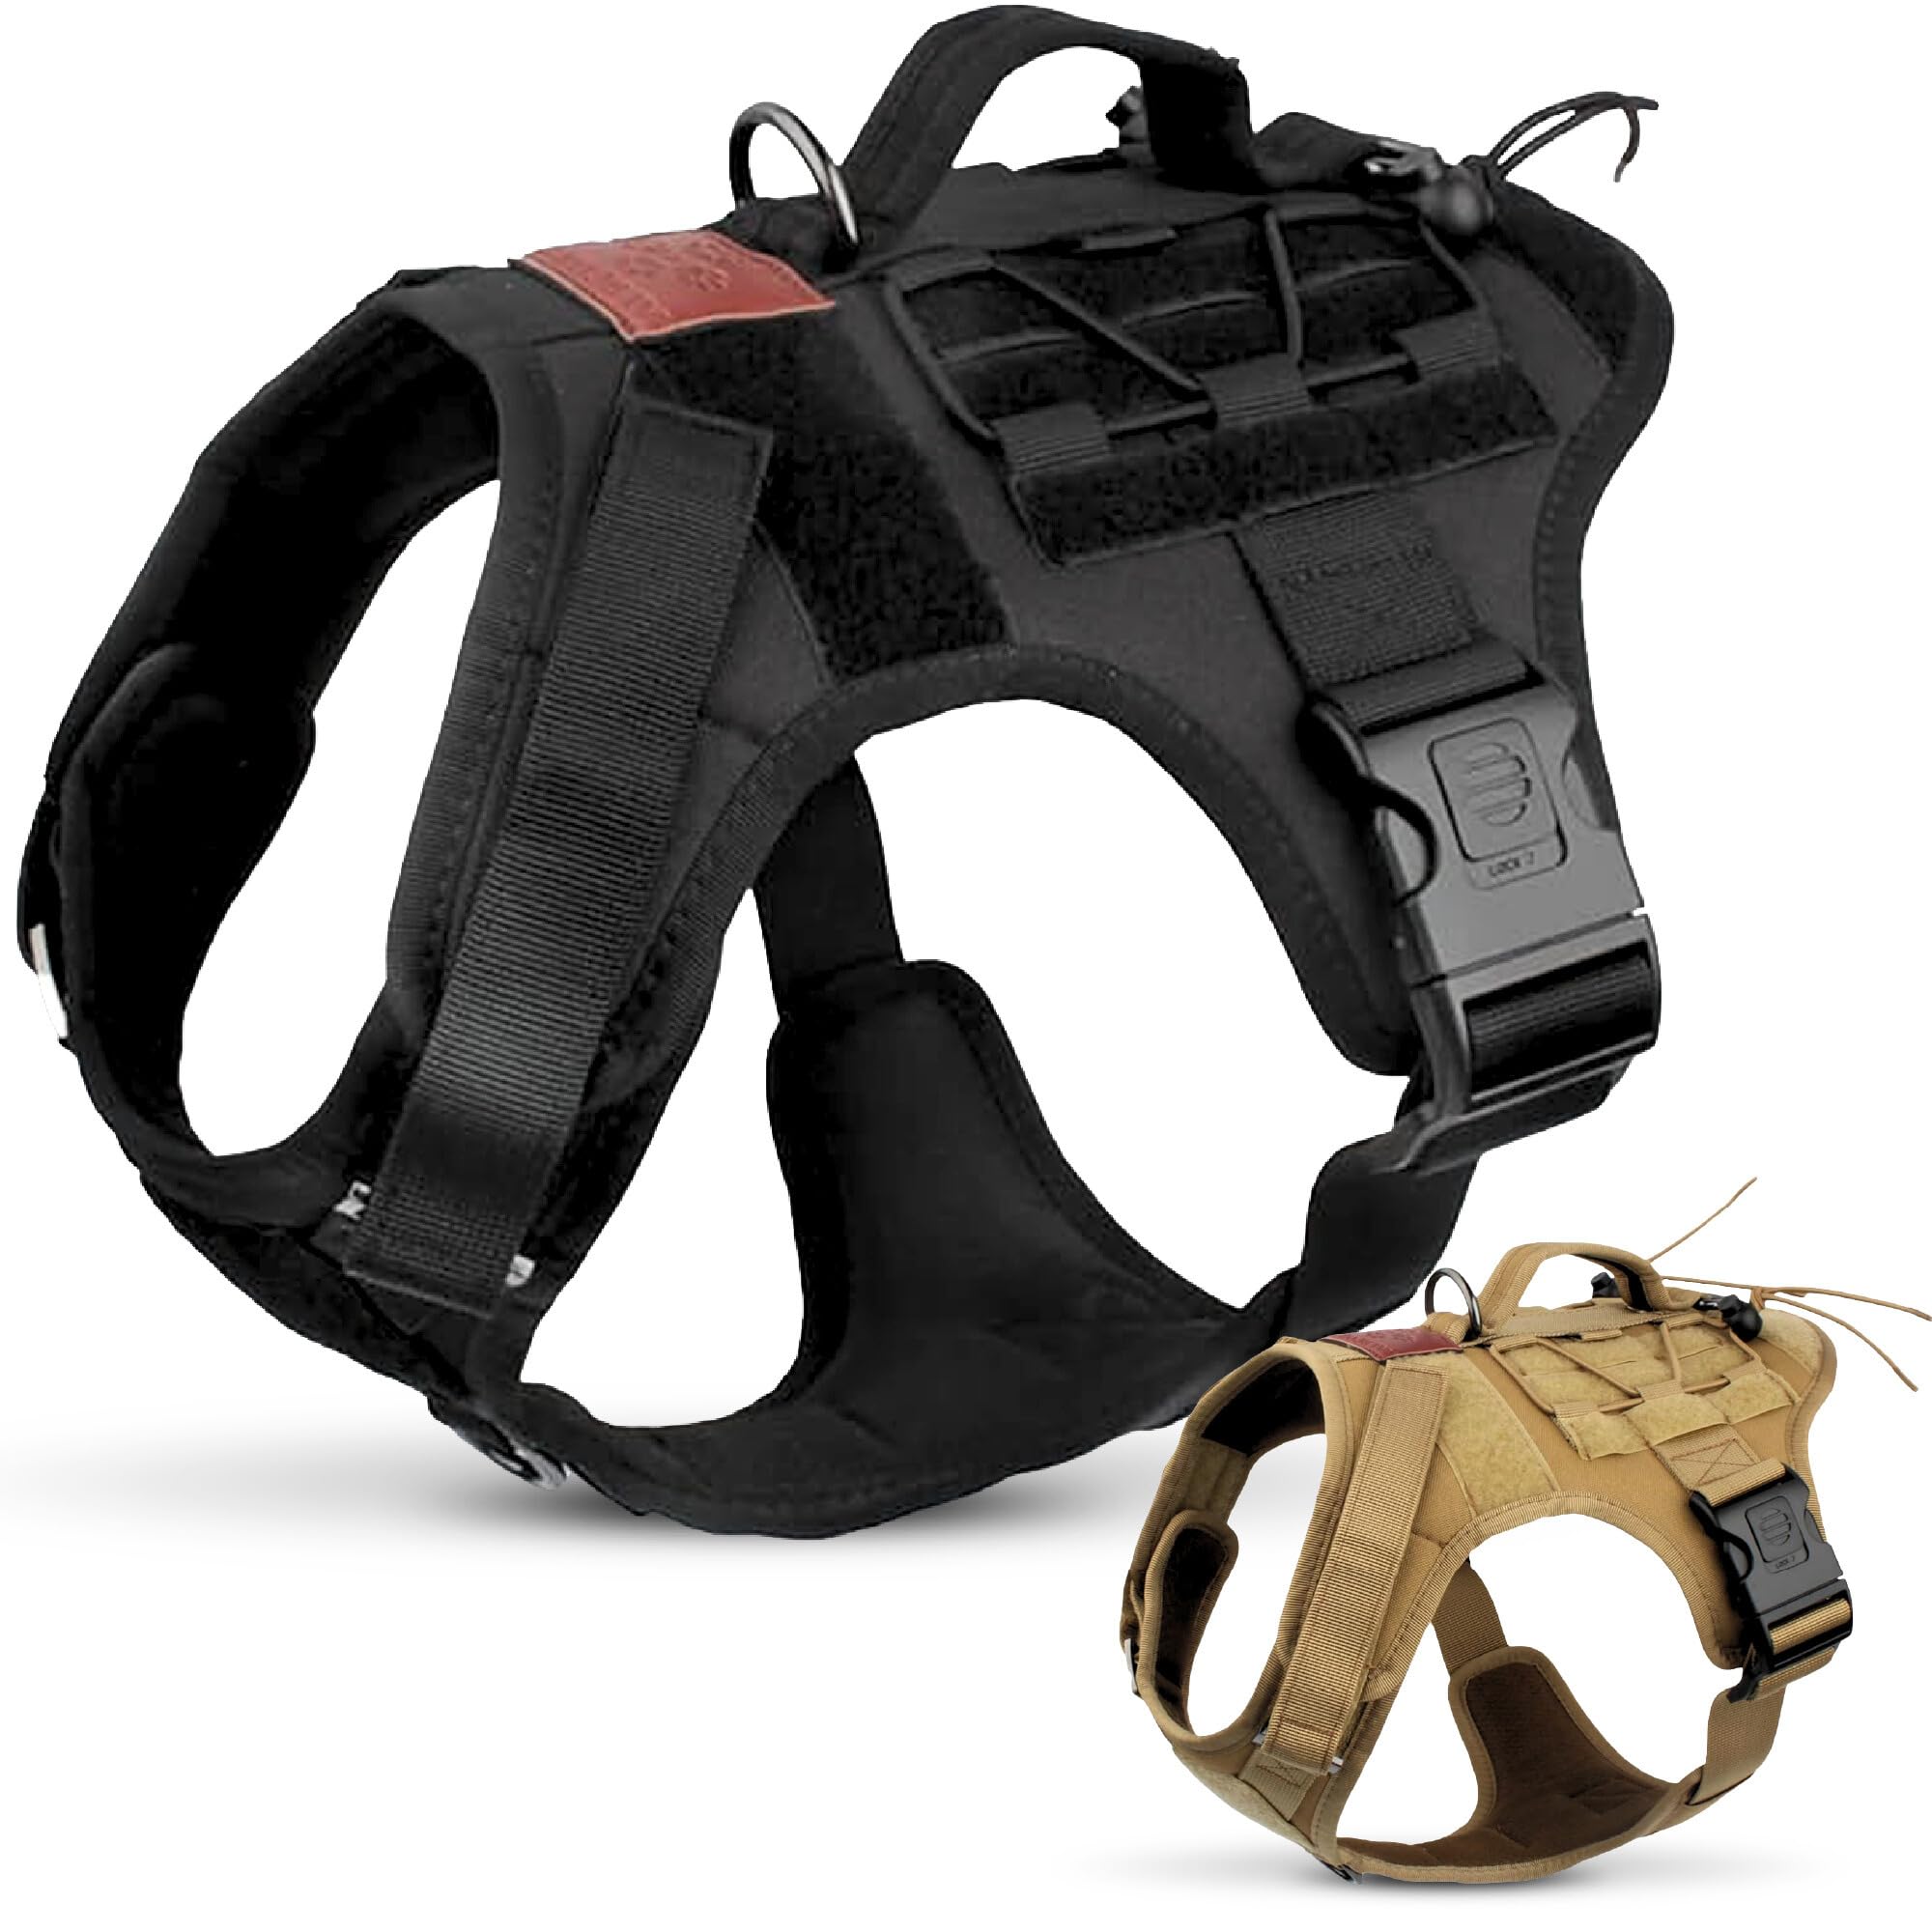
Vest harness
Open every buckle and lay the vest flat with the back panel face-down. Set it across your dog’s back so the spine runs down the center and the leg holes roughly align with the front legs. Lift each front paw gently and thread it through the corresponding leg hole. If a hole feels tight, stop: the harness is the wrong size. Connect the front buckle first and work back toward the tail. Once all buckles are closed, tighten from front to back and run the two-finger test at each strap.
Never force a leg through a harness opening. If you have to wrench a leg to get it through, the harness is either the wrong size or incorrectly oriented. Forcing it can injure a shoulder or startle a dog badly enough to make all future harness fittings difficult.
4. How to Check the Fit
A harness that’s on correctly and adjusted to fit stays in position, distributes pressure evenly, and does not restrict your dog’s movement or breathing. There are four things to check, and none of them take more than 30 seconds.
The two-finger test
Slide two fingers flat under every strap including the neck loop, chest strap, belly strap, and any side panels. The right fit: your fingers slide in with noticeable resistance but aren’t jammed. If three or more fingers fit easily the harness is too loose. If you can barely fit one finger the strap is too tight. Two fingers with light resistance is the target at every single strap.
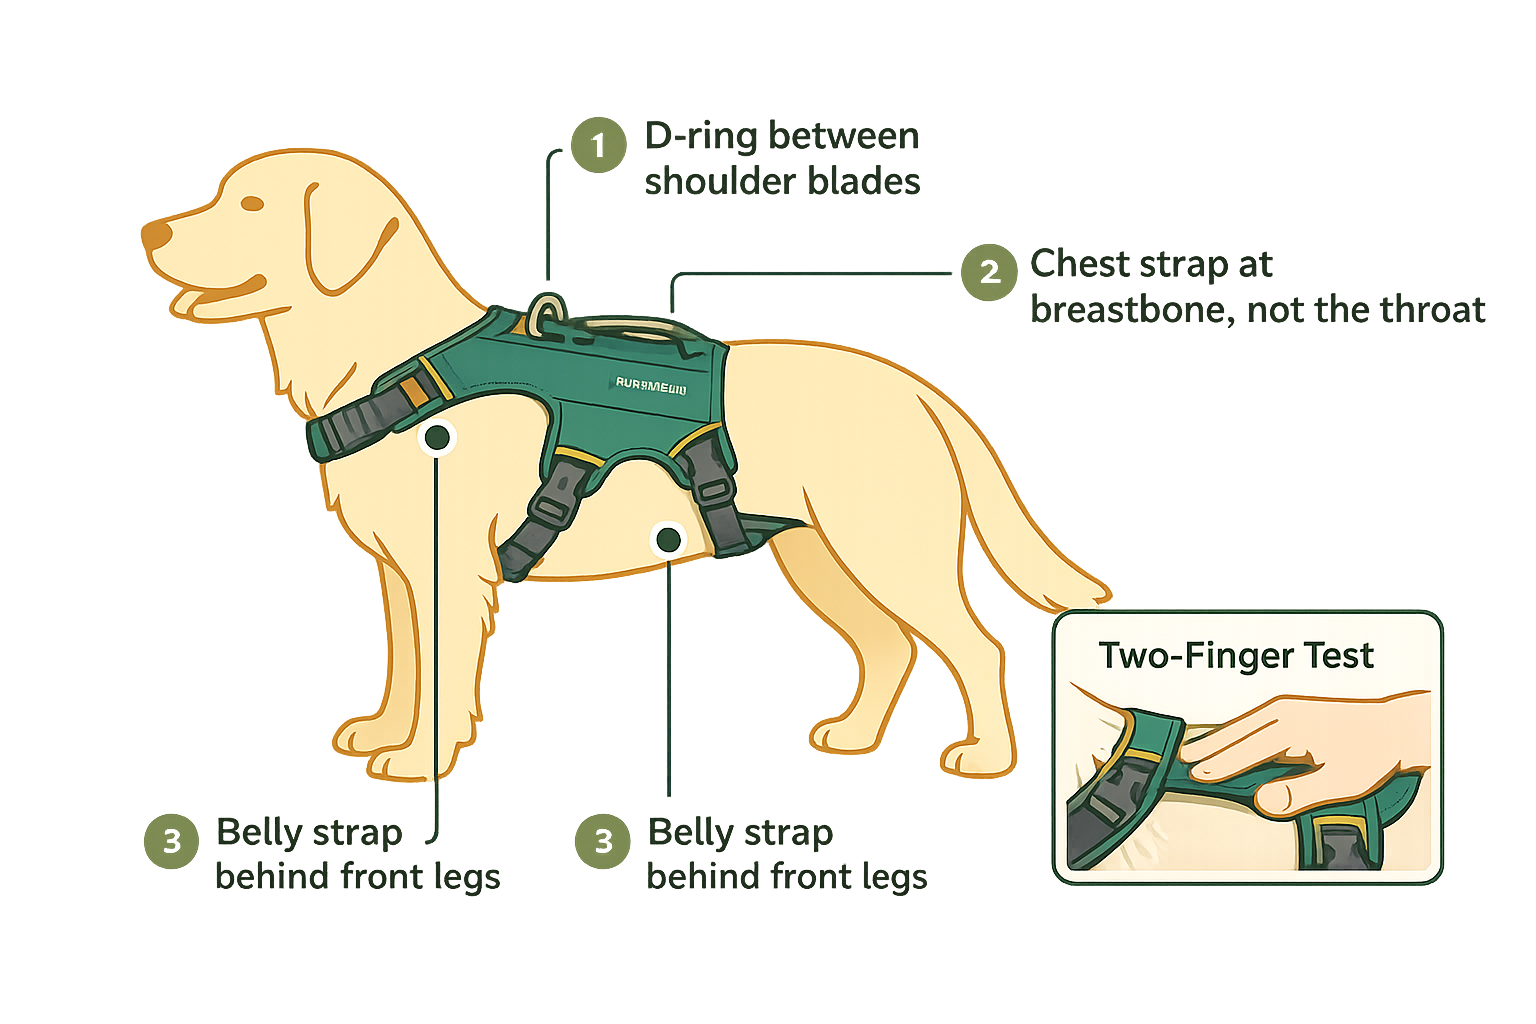
Position checks
Confirm where each part of the harness is sitting. The chest strap should rest across the breastbone, the flat bone between the front legs. If it has crept up toward the throat, shorten it. The back D-ring should sit between the shoulder blades at the center of the upper back. The belly strap should sit directly behind the front legs at approximately the last rib. Finally, run a finger into the armpit area behind each front leg: the single most common chafe point on long hikes.
Movement check
Walk your dog 10 to 20 paces and watch from both the side and directly behind. The harness should hold its position completely: D-ring centered, chest strap at the breastbone, no rotation. A dog shortening their front stride is usually responding to a chest strap that’s sitting too low or pulled too tight across the shoulder.
5. Common Problems and How to Fix Them
Most harness problems trace back to one of a short list of causes. These aren’t failures of the gear; they’re fitting adjustments that take 30 seconds once you know what to look for.
| Problem | Most Likely Cause | Fix |
|---|---|---|
| Harness slides forward toward the throat | Belly strap too loose or positioned too far back | Move belly strap directly behind the front legs and tighten until two fingers fit with resistance |
| Harness rotates sideways during walking | One side strap tighter than the other, or wrong size | Loosen both side straps and re-tighten evenly. Check that D-ring is centered on the spine. |
| Dog backs out of harness | Harness too large or straps too loose | Tighten all straps to the two-finger standard. Consider a snug-fit or martingale-style harness for escape artists. |
| Redness or fur matting behind front legs | Chest or axillary strap rubbing the armpit | Check armpit clearance. Tighten chest strap slightly to lift it off the armpit area. |
| Dog refuses to step into or put head through harness | Harness aversion or sensitivity | Slow down. Use high-value treats at every step. Try a vest harness that doesn’t require head-over application. |
| Chest strap pressing on the throat | Harness too large, or chest strap too long | Shorten the chest strap. If it cannot be shortened enough, the harness is too large for this dog. |
| Dog shakes repeatedly after being harnessed | Discomfort or unfamiliarity | Re-check every strap for pressure points. Normal adjustment shaking usually stops after a short walk. |
When a harness is consistently difficult to keep in position despite correct fitting, the problem is usually body shape. Deep-chested dogs like Boxers, Vizslas, and Weimaraners often do better in overhead or vest harnesses. Our guide to the best hiking dog harnesses covers fit by body type.
6. Trail-Specific Tips
A harness that fit perfectly in the driveway behaves differently after five miles of steep trail. Dogs pant harder, their chest expands more with each breath, and a strap that was snug at home can feel noticeably tighter once your dog is excited and working. Get into the habit of doing a quick two-finger check at the trailhead before you start.
Front clip vs back clip
Most hiking harnesses have two D-rings: one on the back between the shoulder blades, and one on the chest at the breastbone. The back clip is standard for most trail use. The front clip redirects a pulling dog back toward you and is most useful on high-traffic trail sections or when wildlife is close. A dual-clip leash lets you use both points simultaneously.
Remove the harness at camp
On multi-day trips, take the harness off at camp and let your dog’s skin breathe. Before putting it away, check the skin under the straps for early redness. A small hot spot caught on night one is easy to manage; the same hot spot ignored for three days can end a trip early.
Many popular Oregon Cascade routes require dogs on leash year-round, including most wilderness areas and the Columbia River Gorge National Scenic Area. A properly fitted harness gives you significantly better control than a collar alone on steep switchbacks. Check dog-friendly hiking in Oregon for current leash rules by trail.
Dog Harnesses for Hiking at a Glance
Six tested picks across size ranges and styles. All available on Amazon with fast shipping.


How to Put On a Dog Harness FAQs
