Footwear field guide
How to Waterproof Hiking Boots
A boot’s factory waterproofing is a gesture, not a system. Refreshing it yourself takes 45 minutes and twelve dollars, and it adds years of life to leather, nubuck, fabric, or Gore-Tex uppers, as long as you use the right product for the right material.
A single product does not work on every boot. Wax that is perfect for full-grain leather will ruin a pair of Gore-Tex trail runners by clogging the membrane. A spray that performs well on synthetic fabric does almost nothing for oiled leather. The first decision is not how to waterproof but what to waterproof with, and that comes from looking at what your boots are made of. This guide on how to waterproof hiking boots covers the matching, the five-step process, and the differences between the three product categories. If you have not picked your boots yet, see how to choose hiking boots; if your boots are new and stiff, the break-in guide covers blister prevention before you treat them. For trails with creek crossings, deep snow, or scree, pair your treated boots with gaiters to keep water and debris out of the top of the boot.
1. Why factory waterproofing fades
Most hiking boots leave the factory with a thin coat of durable water repellent (DWR) on the upper, plus whatever inherent water resistance the leather or membrane provides. That coat is not built to last. It wears off through abrasion, UV exposure, dirt, and the surfactants in sweat and stream water. After roughly fifty miles of trail, the DWR on a fabric boot is already noticeably weaker. After a season, it is mostly gone.
Wet leather is a separate problem. When leather soaks through repeatedly without re-treatment, the natural oils that keep it supple wash out. The fibers stiffen, crack at flex points, and eventually fail at the seams. A pair of full-grain leather boots that gets re-waxed twice a year can last fifteen seasons. The same pair, never re-treated, is usually shot in three.
The good news: how to waterproof hiking boots yourself is the cheapest piece of gear maintenance you will ever do, and the easiest. The hard part is just remembering to do it.
2. Match the product to your boot
Three categories of treatment, and the right one depends entirely on what your boots are made of. Putting wax on a Gore-Tex boot ruins the membrane. Putting spray on smooth oiled leather barely penetrates. The grid below is the only decision you need to make before you buy anything.


3. How to Waterproof Hiking Boots in Five Steps
This works for all three product types. Where the steps differ, the variations are called out inside each step.
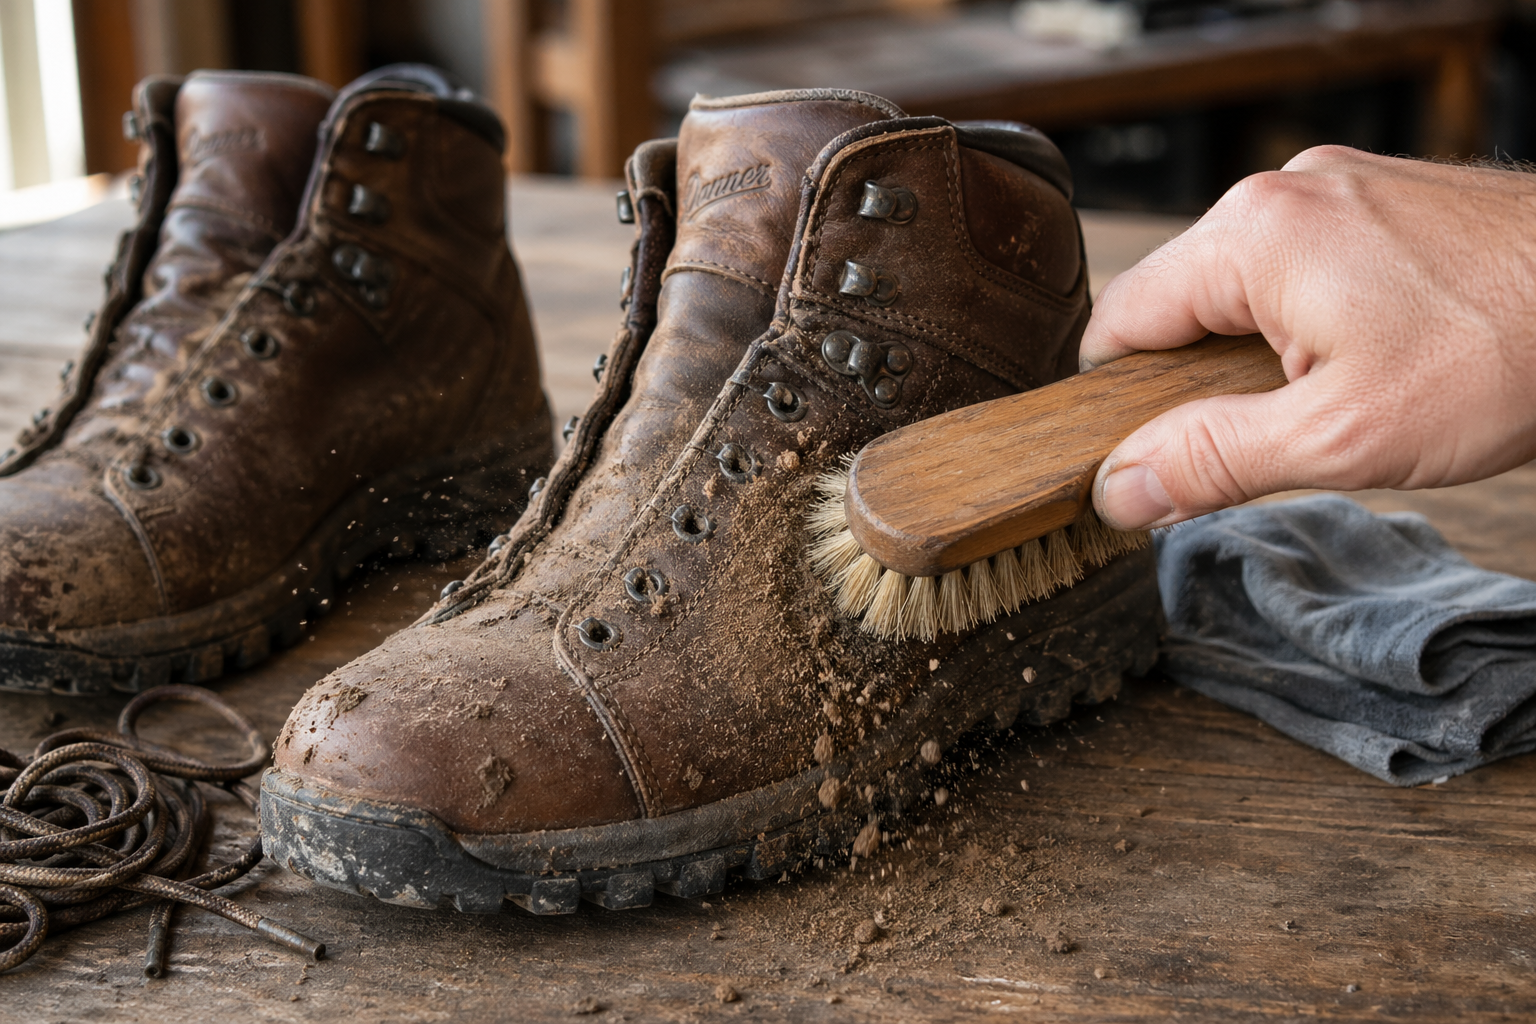
Clean the boots thoroughly
Pull the laces (optional but it lets you treat the tongue gusset properly). Brush off all dry dirt with a soft-bristle brush, then wipe with a damp cloth or rinse the uppers under cool running water. For salt stains, dab with a damp cloth and a few drops of white vinegar, then rinse.
Skip household soap. Dish soap, hand soap, and laundry detergent leave a surfactant residue that blocks waterproofing from bonding. If the boots are seriously grimy, use a boot-specific cleaner like Nikwax Footwear Cleaning Gel.
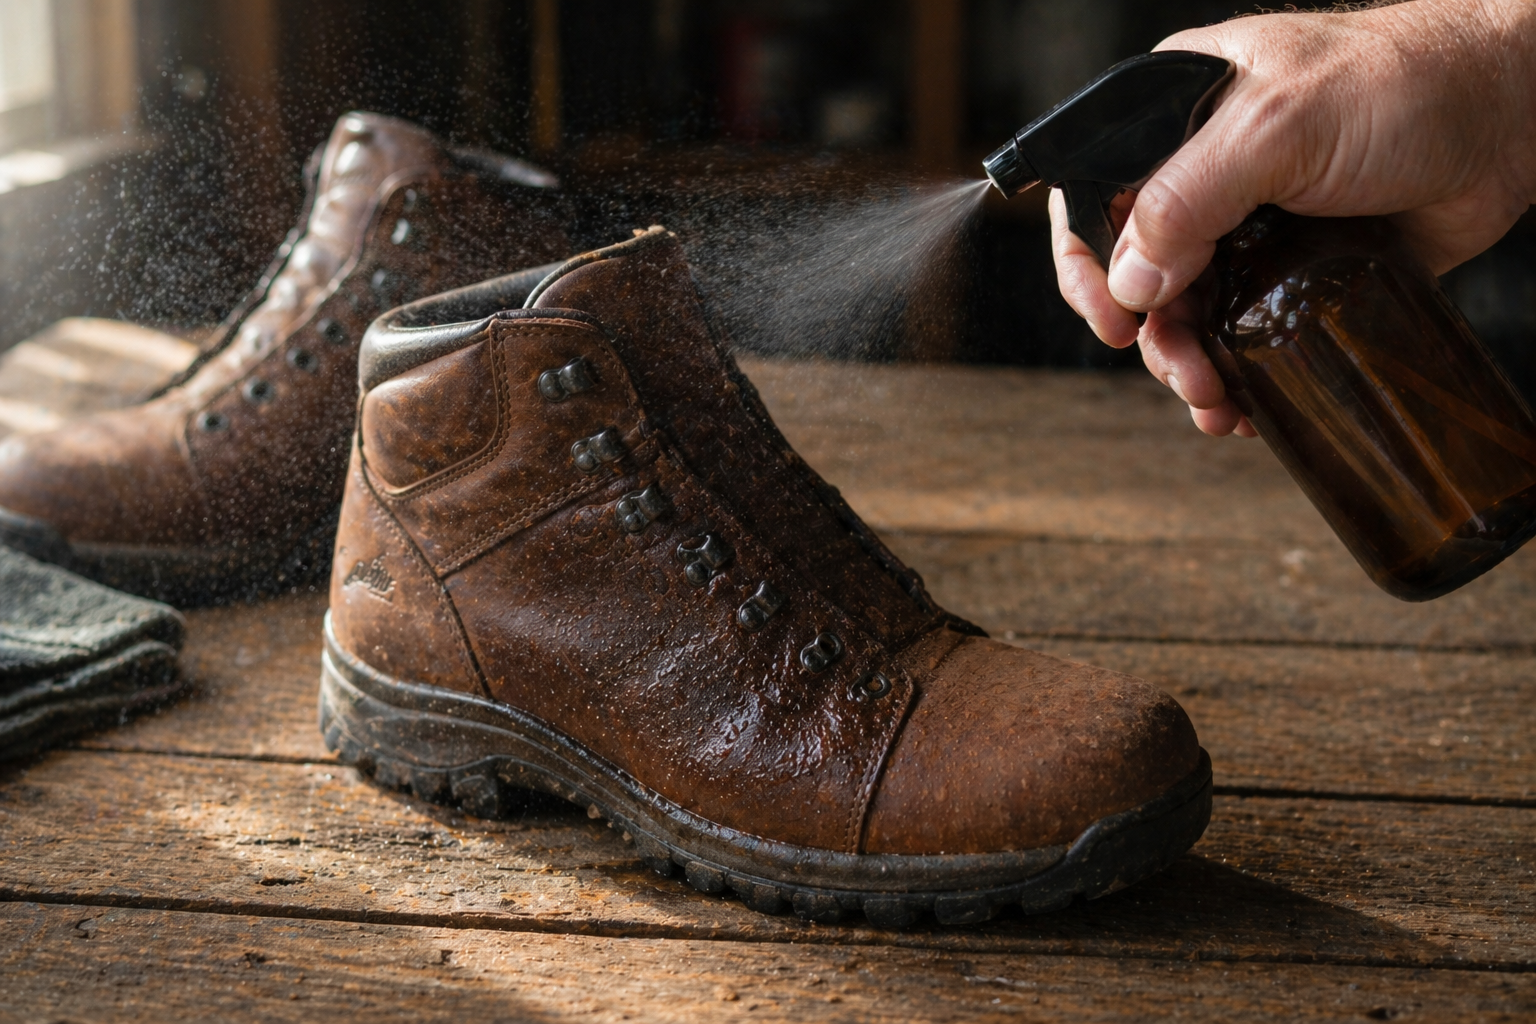
Lightly dampen the uppers
Slightly damp leather and fabric absorb treatment more evenly than bone-dry surfaces. If you just rinsed the boots, you are already there; skip ahead. If they are dry, mist them lightly with a spray bottle of clean water until the uppers darken slightly but the boot is not dripping.
This step matters more for wax and cream than for spray. Spray-on DWRs can be applied to dry boots without issue.
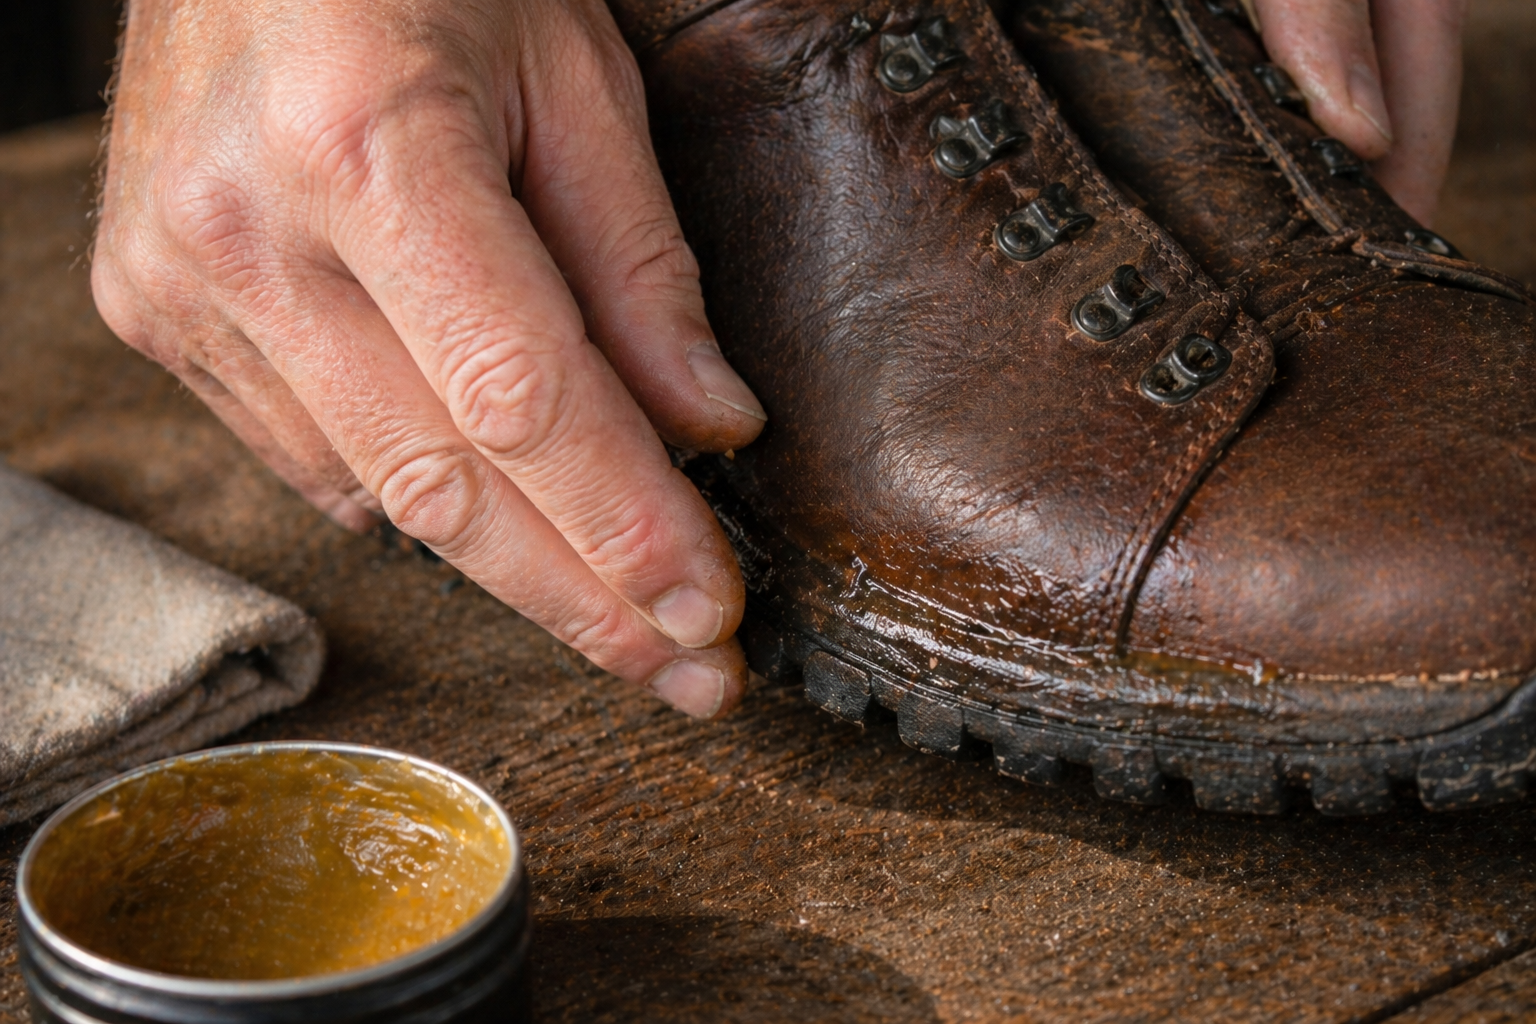
Apply the matched treatment
Wax (leather): Use a clean cloth or your fingers. Work product into the seams, stitching, and crease points first, then move to the open upper. Two thin even coats beat one thick coat. A hair dryer on low heat helps wax soak in faster but is optional. Avoid heat near synthetic uppers.
Cream (nubuck or suede): Squeeze a dime-sized amount onto a soft cloth. Rub in small circular motions. Cream usually needs only one coat. After it dries, brush nubuck with a stiff suede brush to restore the nap.
Spray (fabric, synthetic, Gore-Tex): Hold the can six inches from the boot. Use even sweeping passes; do not soak the fabric. Pay attention to seam-tape edges and the tongue gusset. Wipe any pooled spray off the smooth panels with a clean cloth.
Wipe excess and let dry
Wipe off any visible product with a clean cloth. This matters most for wax: leftover paste hardens into white streaks if you let it. Set the boots in a well-ventilated room out of direct sunlight. Twelve to twenty-four hours is the right dry time.
Do not speed-dry with heat. Heat guns, hair dryers on high, fireplaces, and hot car dashboards all damage the adhesives that hold soles to uppers and can delaminate Gore-Tex membranes. Patient drying is part of the process.
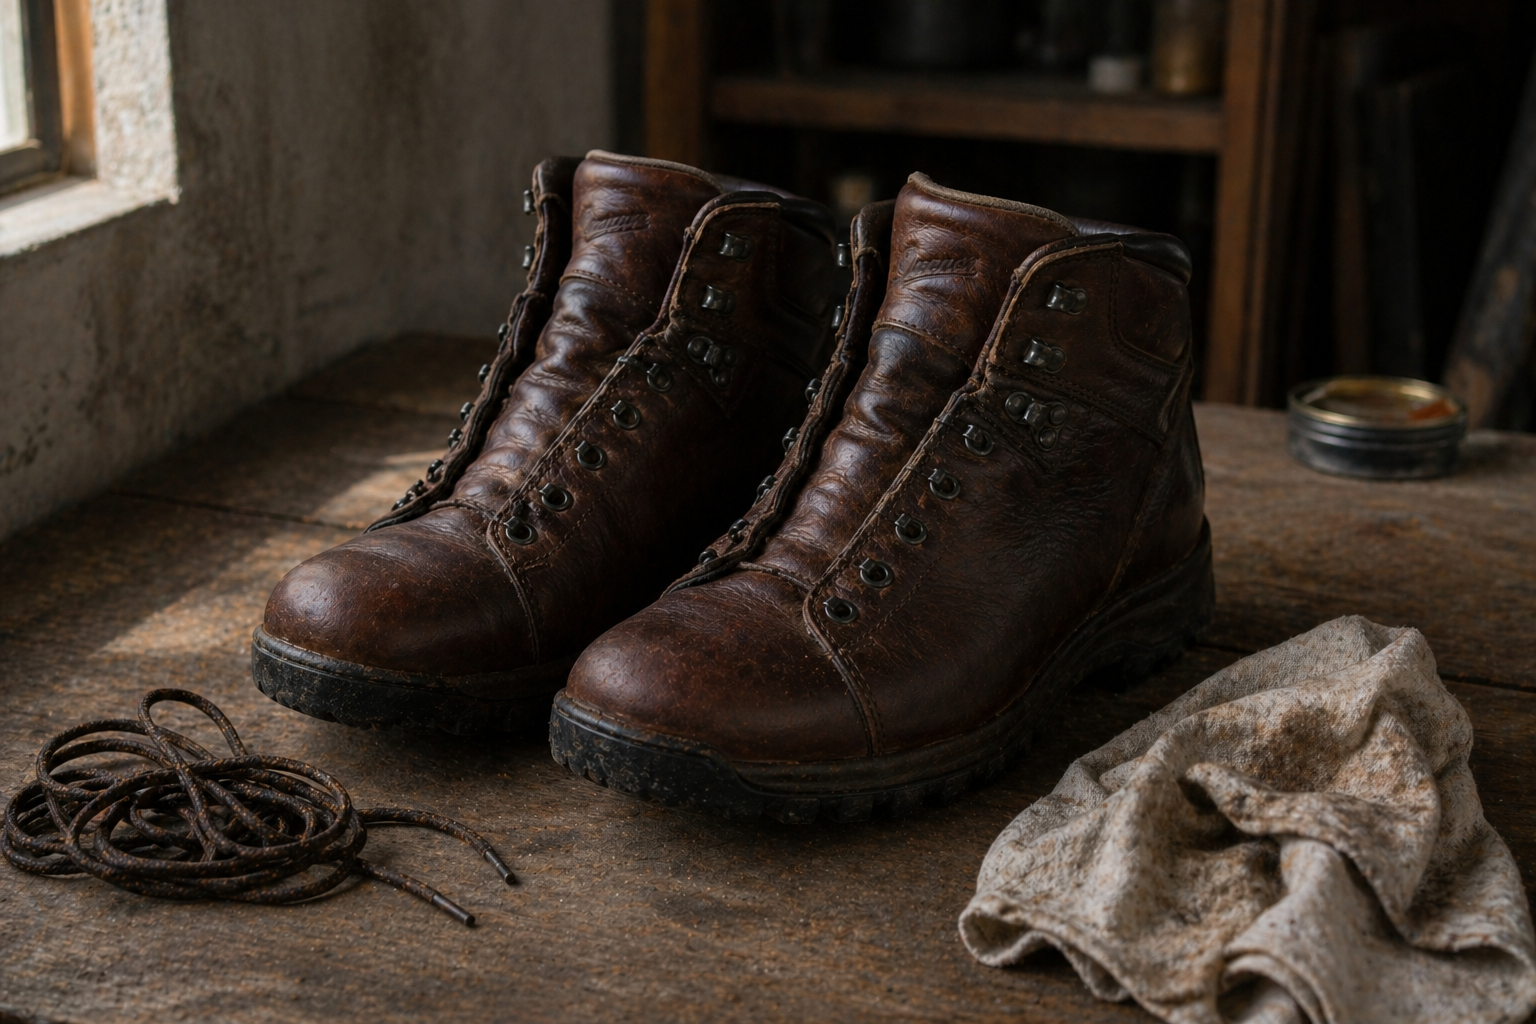
Run the water-bead test
Sprinkle a small amount of water on the dry upper. Drops should bead up tightly and roll off the surface. If water flattens out or soaks in, that area needs another light coat. The test takes ten seconds and tells you whether the job is done.
Walk around the house for a few minutes before any actual hike. Treated soles can be slightly slippery on hardwood until any product on the rand wears off. This is not dangerous, just startling.

4. Wax vs cream vs spray
The quick comparison, with what you can actually expect from each product type:
| Product | Best on | Lasts | Cost | Color shift |
|---|---|---|---|---|
| Wax | Full-grain leather | 3 to 6 months | $7 to $15 | Darkens, fades back |
| Cream | Nubuck, suede, chrome-tanned leather | 2 to 4 months | $10 to $20 | Minimal |
| Spray (DWR) | Fabric, synthetic, Gore-Tex | 2 to 3 months | $12 to $18 | None |
5. Material-specific care
Knowing how to waterproof hiking boots correctly comes down to what kind of upper material you’re working with. Each of the four common materials has a different right-product and a couple of small technique adjustments worth knowing.
Full-grain leather
The toughest, longest-lived upper material and the simplest to maintain. Use wax. Sno-Seal works on most boots; Obenauf’s LP is the heavier-duty option for oiled leather and heavy-use boots like Whites and Nicks. Apply liberally to oiled leather, more sparingly to chrome-tanned. Two thin coats beats one thick coat every time.
Nubuck and suede
Nubuck is sanded leather; suede is the underside of a hide. Both have a soft napped finish that wax flattens permanently. Use a cream like Nikwax Nubuck Proof or a dedicated suede protector spray. After it dries, brush in the direction of the nap with a stiff brush to restore the texture.
Fabric and synthetic uppers
Spray-on DWR is the only safe option. Wax stiffens woven fabric and can damage the glue holding mesh inserts. Apply spray with even sweeping passes from six inches away. Pay particular attention to seam-tape edges and the tongue gusset; these are the first places water finds.
Gore-Tex and waterproof-membrane boots
Same answer as fabric: spray only. The membrane is doing the actual waterproofing on these boots; the DWR coat just keeps the outer fabric from soaking through and “wetting out,” which is what makes the boot feel cold and clammy even when no water has come in. When the DWR is healthy, the outer fabric stays dry to the touch and the membrane works freely.

Mixed materials (most modern boots)
Modern hiking boots often combine a leather toe and heel with fabric or synthetic side panels. In that case, treat the leather sections with a cream (kinder to the synthetics if it strays) and the fabric sections with spray. Mask the leather with a cloth while spraying, and avoid overlap. If you are not sure what your boots are made of, the hiking boot guide has visual identifiers for each material category.
6. How often to reapply
Knowing how to waterproof hiking boots is half the work; how often to redo it is the other half. The honest answer is “when the water-bead test fails.” But here is a useful starting calendar:
- Brand-new boots: treat once before the first wet hike. Factory DWR is light and partly meant for shelf life, not trail use.
- Heavy use (backpackers, river crossings, wet meadows): every 2 to 3 months in the active season. Wet feet are the leading cause of hiking blisters, so re-waterproofing on schedule is foot care as well as boot care.
- Moderate use (weekend hiker, dry to moderate trails): every 6 months, or twice a year.
- Light use (occasional walks, mostly dry conditions): annually, or whenever the bead test fails.
- End of season storage: always treat before storing for a winter or summer off; treated leather stores better than untreated.
7. Common mistakes
Once you know how to waterproof hiking boots in principle, these are the eight most common ways people get the execution wrong:
- Using wax on Gore-Tex or synthetic boots. Clogs the membrane and stiffens fabric. Spray only on these.
- Skipping the cleaning step. Dirt under treatment seals the dirt in, not the water out. The boots will look fine and leak by the end of the first hike.
- Speed-drying with heat. Heat guns, hair dryers on high, fireplaces, and dashboards all damage glues and membranes. Air dry overnight.
- Ignoring the seams and stitching. Water enters through stitch holes long before it soaks through the upper itself. Treat seams first, always.
- Drying in direct sunlight. UV bleaches dyed leather and degrades synthetics. Dry in a shaded, ventilated room.
- Storing damp boots in plastic. Mold takes hold in two days. If you must store boots wet, leave them open in a ventilated bag with cedar or newspaper inside. Merino socks dry faster than synthetic in storage too.
- Using shoe polish. Polish colors leather; it does not seal water. The boots will look great and still leak.
- Applying too much product. Excess wax stiffens leather and shortens flex life. Thin even coats are the answer.


Can you waterproof Gore-Tex hiking boots?
Yes, but only with a DWR spray made for waterproof-membrane footwear, like Nikwax Fabric & Leather Proof or Granger’s Performance Repel Plus. Never use wax or oil-based products on Gore-Tex; they clog the membrane from the outside and ruin its breathability, which is what makes Gore-Tex work in the first place.
How long does waterproofing last on hiking boots?
Two to six months depending on use and product. Wax on full-grain leather lasts 3 to 6 months for moderate hikers. Sprays on fabric or Gore-Tex usually last 2 to 3 months. The water-bead test is the reliable measure: sprinkle water on a clean, dry boot, and if it stops beading, re-treat.
Does waterproofing wax darken leather permanently?
Wax darkens leather noticeably right after application, but the effect fades as the wax wears in. Full-grain leather treated with Sno-Seal or Obenauf’s typically returns close to its original tone within a few weeks of regular use. Nubuck and suede are more sensitive; use a dedicated nubuck cream instead of wax to avoid permanent matting of the nap.
Can you use shoe polish to waterproof hiking boots?
No. Shoe polish is formulated to color and shine dress leather, not seal water out of working footwear. Polish does not penetrate deeply enough to protect stitching and seam areas where water enters first. Use a dedicated boot wax, cream, or spray instead.
Should I waterproof brand-new hiking boots?
Yes, before the first wet hike. Factory waterproofing is light and meant for shelf life rather than trail use. A first treatment with the appropriate product for your boot material extends durability and gets you ahead of seam wear. Check your warranty first; a small number of brands ask owners to wait until after a break-in period.
What is the difference between wax, cream, and spray?
Wax (paste or bar form) gives the most durable seal and is best for full-grain leather. Cream is a softer formulation for nubuck, suede, and chrome-tanned leather; it preserves color and nap better than wax. DWR spray is the only option safe for fabric, synthetic, and waterproof-membrane (Gore-Tex) boots; it does not clog breathable membranes.
Can you over-waterproof hiking boots?
Yes. Excess wax stiffens leather and can shorten the life of the boot by reducing flex. Apply thin, even coats and wipe off any visible residue. With sprays, soaking the fabric is unnecessary; even sweeping passes are enough. More product does not mean more protection.
How do I clean salt stains off hiking boots before waterproofing?
Wipe the affected area with a damp cloth and a few drops of white vinegar diluted in cool water. Vinegar dissolves the salt without damaging leather. Rinse with clean water afterwards and let the boot dry to a slightly damp state before applying your waterproofing product.
